"I come into the peace of wild things who do not tax their lives with forethought of grief. For a time I rest in the grace of the world, and am free." ~Wendell Berry
With the cooling weather - (well, "COOLER" than it has been), I was able to get out and take a stroll around our various meadows. I was actually quite surprised to see how many plants have already gone to seed already. I've been sequestering myself inside as I just can't stand this heat in a month where it's supposed to be so cool. Did I mention that Fall is my favorite season??
This year, I wanted to document (via pictures) all the various seeds before I actually gather them, just to see how many varieties I had.
So, here goes:
New England Aster (Aster Novae-angliae)
Maximillians (Helianthus Maximiliani)
Goldenrod (Solidago - either Nemoralis or rigida)
Prairie Blazing Star (Liatris pycnostachya)
This one cracks me up. The seed head is about 18" long on this one, and I actually found others that had very large seed heads.
My rule-of-thumb: one-third of the seed is for me, one-third of the seeds I scatter in the same location as the plant (as would happen in nature), and one-third I leave for the my yellow-bellied (and other) pirates.
Big Blue Stem (Andropogon gerardii)
Indian Grass (Sorghastrum nutans)
Gray-headed Coneflower (Ratibida pinnata)
Possum Haw (Ilex decidua)
This 'shrub' has gotten huge and has been very loaded with berries the last few years.
Dogwood (Cornus spp.)
Slender Mountain Mint (Pycnanthemum tenuifolium)- I've been so pleased to see this stuff starting to spread to all the meadows!
Purple Coneflower (Echinacea purpurea)
Pale Purple Coneflower (Echinacea pallida)
Rough Blazing Star (Liatris aspera)
Wild Senna (Senna marilandica) - this one was a 'volunteer' in the ravine area.
Ok, I reached this point and found that I was exhausted trying to catalog all the various native plants that were going to seed. Wow girl, what a problem to have!
A few weeks ago, I received a message from a long-time purple martin
friend - I'll call her "Jane" to protect her privacy. She informed me
that she had been diagnosed with pancreatic cancer and only had about 2
months left to wander this mortal coil. While my shock was nowhere near
what hers must have been, I was still stunned. She's only about 10 years
older than me and the medical community had failed in her initial
diagnosis. But her request was even more surprising.
Jane and I had never met in person, but we had spoken on the phone
several times over the last few years about our shared experiences with
owl issues and messaged each other on Facebook....replied to each
other's comments about purple martins, etc. So, I felt like I *knew* her
already we had become friends through our interactions. Her request - she wanted me to come and remove all her purple martin and
bluebird housing - all of it - for free - and give it to a good home.
Note, this is a picture of my Troyer Super system gourd rack
I've never received a call like that one, so I had no frame of
reference on how to react or deal with this type of request. "Of
course", I replied, "I'll help in any way I can". She wanted me to come
dismantle everything and haul it away as soon as I could, so that her
husband wouldn't have to deal with it after her death. My brain felt
like it had a very loud pinball machine going at full speed inside my skull. "But,
OMG, it's 100 degrees outside!", my brain screamed. Ping! Then, "OMG,
she's dying and I need her to know that I fulfilled her last wishes". I
contacted my neighbor to confirm that he wanted the equipment since he
had shown interest in setting up a gourd rack this summer. He confirmed
that he wanted it and would help me / her with whatever was required. We
confirmed a date (last Saturday).
She sent me another message within a week and told me she was
declining fast and almost bedridden and gave me her husband's phone
number, in case she was gone by the time we could get there. I called
him and he told me, "it's going to be so hot that day". I offered to
come at a later date when it was cooler and he said, "no, I need it all
gone".
Ping, ping, PING. Finally resolving myself that we could just take
frequent breaks and take it slow, we (my husband, neighbor & myself)
figured out what tools we would need to dismantle everything and got up
early Saturday to make the 2.5 hour trip to her house. When we arrived,
it was already 90 degrees outside and blazing hot sun was beating down
on us. My neighbor had brought his 16' trailer pulled by his pickup.
Jane's husband, "John" walked over & introduced himself. As we
previewed everything, he made comments as to the modifications she had
made to her housing, the owl fencing, etc., and said, "she did a lot of
this based on your recommendations". Ping....
We were stunned at the amount of bluebird houses (14) with poles
& predator guards, and even more stunned by the quality (and
quantity) of her purple martin systems - 1 Gemini and 1 Troyer Super
System gourd rack, plus 4 other Troyer gourd rack systems (2") square
poles and the pile of already-cleaned-out horizontal & vertical
Troyer and S&K gourds. And 3 modified Trio aluminum houses. Every
pole had a predator guard, snake netting. A wide variety of traps,
including the Blaine's elevator trap. ReoLink cameras - new, not even
removed from their packaging yet. Three storage bins marked, "PM stuff".
A box with her handwritten note, "Trail Cameras - Kathy Freeze".
Ping...my heart ached seeing her own handwriting. The heat wasn't helping.
I started trying to figure out where to start first. Luckily, my
husband led the charge. He grabbed some wire cutters and went to the
closest purple martin gourd rack and started clipping the zip ties that
secured the fencing to her racks. Bazillions of zip ties....yes,
bazillions. I told her husband, "they call me the Queen of Zip Ties on
the purple martin forums, but now I see - I don't hold a candle to
Jane...holy cow!". A little levity in a very sad setting. All 3 of us
clipped & clipped and finally got rack #1 down. Moving on to rack
#2. The sun felt like it was going to burn through my skin. My neighbor
whispered to me, "this is a LOT more than I expected". Yeah, me too -
all of it was overwhelming. Every bit of it....the sadness of the
situation, the look in her husband's eyes, along with his soft demeanor
as he told me, "This was her passion - she was out here all the time
working with her birds". And I suddenly realized just how much she and I
were really alike. Ping...
2 of the 14 bluebird houses
John told me she was bedridden now and wouldn't last much longer.
Ping.. and here I was dismantling her passion just outside her front
door....struggling with the extreme emotions of being happy that my
neighbor was the beneficiary of such great, well-cared-for, quality
equipment, proud that she had selected me to be the recipient to
distribute the stuff, yet, so sad that these were the circumstances
under which it had occurred. Adding to that, my thoughts turned to what
would happen to my 'stuff' if this someday happened to me. I laughed (to
myself) about how many zip ties someone would have to cut off my wire
cages (a lot less than we cut off that day!!), how organized my stuff
would be to pass on to someone else - (would it be stored in such nice
bins?)...and started thinking about all the little odds & ends that
someone would look at some day and wonder for what purpose I was keeping
that broken piece of whatever.
Purple martin fledges
The purple martin community has lost a very lovely, passionate
landlord as of this week. She took such great care of her purple
martins, bluebirds and tree swallows. Next Spring, I'm going to complete
my bluebird trail with Jane's bluebird boxes, complete with mounting
poles and predator guards. I'm going to setup her new trail camera and
every time it takes a picture, I'll think of her.
When my neighbor puts up his Troyer gourd rack next year (he's going
to pay the rest of the racks & houses forward to other potential
wannabe landlords), it will make me proud to know that Jane's equipment
is being put to excellent use by multiple new landlords. John thanked us for taking it all down and hauling it away and their
yard looked so barren as we left. I am still very emotional about all of
this....because it has made me think of my own mortality and what
happens in the aftermath of a landlord's passing. In the meantime, I'll
try to be more strategic with my zip tie usage and not keep so many
broken pieces & parts for, "just-in-case". Ping
When it was raining & cold, I was so ready for this season to get started! Now with the heat and humidity, I vacillate between wanting it over & done versus enjoying the show. The problem with trying to enjoy the show right now is all the bugs that attack me when I'm outside. I'm starting to realize, it is my destiny to just experience some minor suffering to do the outdoor things I love.
We are in the stage right now where there are tons of feeding trips occurring in my colony. With only 5 nests fledged, the vast majority of my nests have young, ranging from 1-day old up to 20 days old. That's a LOT of food requirements. Take THAT bugs!! It's amazing to watch how fast the adults deliver food, then depart on another hunting trip. I can always tell when there's another nest preparing to fledge because the fledgling escort crews show up and the normally-very-quiet colony (during this stage), starts becoming very vocal. So, I go watch.
The small escort crew (because the other adults are working - feeding their young!)
It always fascinates me and I ask - HOW do they (the escort crews) KNOW there are young martins about to fledge? Does a martin-wide memo go out in the Purple Martin Kingdom to notify them all of the date & time they need to show up? I need more information, please (and send me a copy of that memo!).
Today's escort crew is small, compared to others. Probably because the vast majority of my colony are parents engaged in feeding their young.
I recently received a lot of questions regarding how I monitor my colony. Which system? Does it record all night? Does it use WiFi - or do you have to connect via an Ethernet cable?
After using the Browning Trail cameras for years to monitor my colony, I was getting tired of having to change out batteries, retrieve & replace the cards every day, but the most daunting realization - I realized I was probably missing some of the owl's activities because the limitations that are always a 'feature' of game cameras. If the owl's attack was too fast, if she was out of range or even didn't cross the required pixels to trigger the camera, or the camera didn't trigger fast enough, I wouldn't know about her attacks. It was time to improve my game. I had already spent a lot of time, effort & money on my systems and the caging, so, why not verify it's working?
I realized Bob and I had set this up about 5 years ago and while I knew all the answers about it then, I had forgotten the very, very deep details about this system. Details that are critical to choosing a system for this particular application. So, I'm documenting them here, and sharing them with you, in case you ever need them. The best part? NO MORE batteries, NO MORE cards, and NO MORE missed activities!
We decided on 4 Reolink RLC-511W cameras (look for the cameras & package deals like this one to be on sale!). The most important qualities for me:
- Zoom - Optical Zoom (digital zoom is too pixelated)! (my cameras are 75' from my colony). I've dedicated one camera to each rack - zoom & focus the racks (3 racks) and the 4th camera to monitor the overall yard (not zoomed in).
- Night vision (they have an IR range of 100'). We added the IR illuminator, which extends the range of the IR out to 300', just to ensure complete coverage. Because "100 feet" really means, "only about 50 effective feet". That's true with all the "night-vision" cameras I've ever tried.
- Most importantly - continuous recording, all night long. Living out in the country, I found motion detection just isn't something I should use. Rain and every large bug that runs / flies across the screen triggers the recordings and I would sometimes miss the owl.
- WiFi - we didn't want to run yet another wire to connect it to the router.
My 4 Reolink RLC-511W cameras + the IR illuminator. Bob built these shelves for me, making the whole system easy to remove for winter storage.
The NVR system (2 TB) storage allows me to record continuously all night. In the morning early hours, the system will FTP the files to another drive where I can then view them on my computer screens with my morning coffee (at 15X speed!). I use "VLC Media Player" (free download) to review my recordings quickly. You can increase the speed of the review, or just pause the video and drag the slider button to watch the video for changes! Now I can see the whole colony and not miss a thing!
The NVR system combined with a cheap monitor!
ccc
A quick check of the monitor and you can see if there are any issues before bedtime!
Behind the Scenes:
We found these weather-proof boxes at Lowe's. The top one contains the 'dongles' (3 wires per camera - 1 with a reset button, 1 for an Ethernet cable connection, and one for the power connection) coming from the cameras. Ugghhh - tuck that stuff away in a box and wear a face shield when you open the box and it all comes sprawling out over you!
2 weather-tight boxes - Lowe's and Home Depot carry these.
The IR illuminator is mounted on a saw horse next to the cameras. It can be easily maneuvered to highlight the right parts of the racks. Just don't point it at the ground too much or you get a lot of reflection from the grass! Ask me how I know. 😏
Outdoor plugs and weather-proof covers on our patio made the task of setting up power for the cameras a breeze. Direct power is required if you want to record continuously. None of the night vision cameras will record continuously on battery power alone.
Outdoor power supply with weather proof cover.
Some electrical cord hangers and you have a neat, organized patio and no one tripping over the electrical cord!
By removing the 4 screws that are used to mount these boards to the porch posts, I can quickly disconnect the wires and bring the cameras inside for winter storage in our unfinished basement.
The cameras stored in our basement. Keeping them out of the winter weather extremes will help extend the life of the cameras.
I created this video in the process of documenting our setup.
Yes, it's an outlay of cash. Is it worth it? I emphatically say, "YES!" It has been the last piece of the puzzle that I needed to give me insight to what was happening with my colony every night and give me the information I needed, in case I needed to quickly adapt in order to thwart her ability to catch martins.
This is a video from the camera that I use to monitor the entire yard:
I am so happy to see that the owl's attacks have been lessening every year. I'm not going to mention a number because I don't want to jinx myself (or my colony). But knowing what's happening in my yard every night is helping me to sleep more peacefully. And, I've repurposed the Browning cameras to watch the activities on my trails so I can see if Molly is still hanging around! Win, WIN!
The weather here in Texas County, Missouri has been less than ideal for raising baby purple martins. We have had lots & lots of rain. Lots. Then, if it wasn't raining, it was cold. Or, it was raining AND cold. My nest check on May 16th revealed that I had 5 pairs (according to the official, "how do you count your pairs" rules) of purple martins. Meaning, 5 nests had eggs. I knew all of the rest were also gearing up to start laying. Then the weather pooped out on us and I thought they would lose all the existing eggs and any that were laid in the meantime.
During a nest check on June 1st, I discovered that was not the case. I found a lot of nests with 1 to 3-day old nestlings. So, the purple martins had shaken their fist at Mother Nature and said, "We SHALL carry on"! I did find 2 dead nestlings and 3 nestlings missing from another nest (there were originally 5 eggs and only found 2 nestlings). Not bad for a brutal 3 weeks. And sub-adults arrived about around May 20th, so lots of fighting going on. As of today, June 20th - I have 82 pair with 266 nestlings, and 66 eggs still to hatch. My oldest ones (from the May 16th nest check) started fledging yesterday!
I've been seeing some posts on various purple martin groups where landlords without predator guards have discovered they've sadly lost their entire colony to a snake or raccoon attack. What makes some of these losses even more difficult is that some of these landlords were given the predator guard information 2 to 3 years ago. Such needless loss.
I have been thinking about my father-in-law a lot lately and the very funny things he did - that will relate to this post.
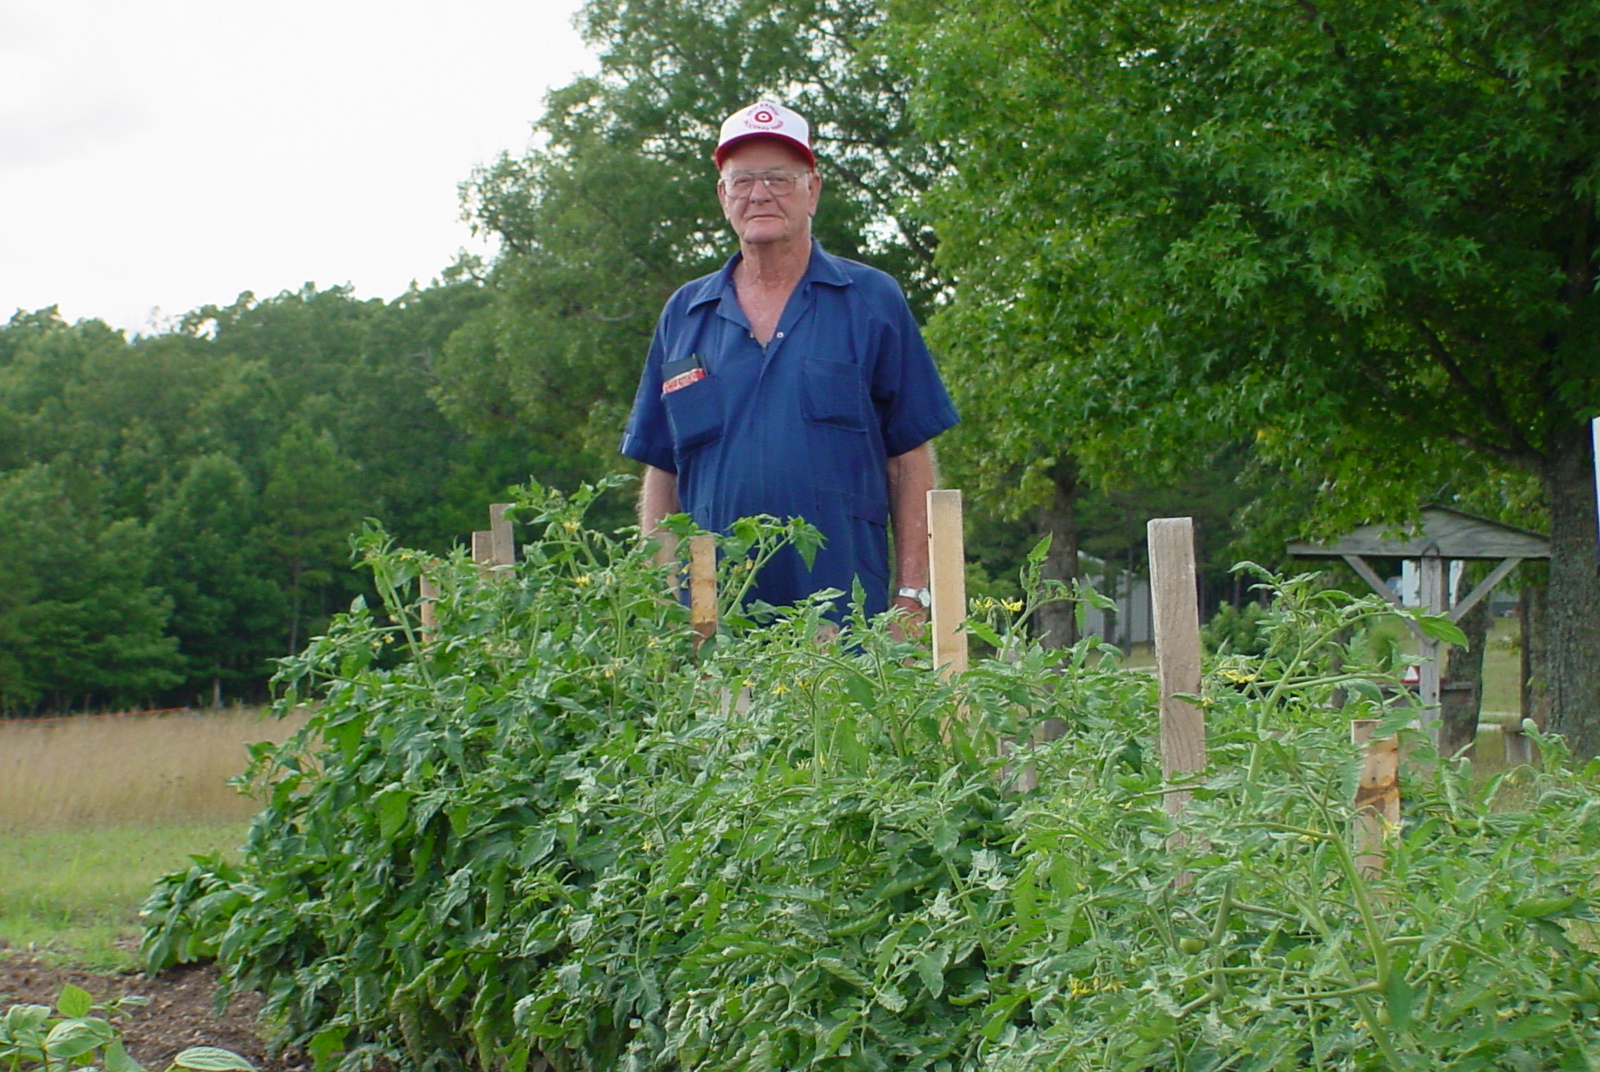
Dad and his garden
When Bob's Dad was still alive and we were building our new homee here, he would frequently invite us over for dinner. One of his favorite sides was cornbread. One night, as we were eating it, I noticed that the cornbread looked gritty and more importantly, tasted like we were eating ground up cornmeal. When I asked him if he had changed the recipe, he said, "yeah, I decided not to add flour. It doesn't need any flour anyway - it still rises and tastes good".
Bob Jr. and Bob Sr. - Dad loved coming over & supervising the construction of everything at our new home site here in Missouri. Even the pond.
"Welllll...that's debatable", I thought (to myself), "are you losing your tastebuds"? Hehe. As time went on, he started leaving other various things out of the recipe; salt, milk (instead, using water), etc., so I started making the cornbread and bringing it over. His only rule was, "NO sugar". I could abide with that one.
On June 5th, my neighbor asked me if it was too late to set up his site
for purple martins. Well, no, if you get it up quickly (next 2-3 weeks).
Sub Adults are still coming in to my site and all my gourds are full. As I gathered the information to give him, and prepared my spiel for
him, I thought of my father-in-law and laughed - "there's a really simple recipe for success".
The recipe to hosting purple martins successfully - and KEEP hosting them far into the future - is really simple.
The primary ingredients - good, manageable housing; good housing location (at least 60 feet +) from trees, removal/eradication of non-native nest competitors (HOSP & starlings), and more importantly, after you attract them - ADD a predator guard to your poles to keep them and protect them.
So, what ARE the required ingredients for a long-term successful site (click on the table below to enlarge)?
My Recipe Card:
As I gave the 'recipe' for success to my neighbor, I thought again of the cornbread story. He setup a quick, homemade gourd rack on June 13, 2025. As of today, June 20th - he has 2 pair of purple martins that look like they will settle in and hopefully nest this year. I'm sure these pairs are overflow from my site and that's why I have no plans to expand my housing. It's so much fun to watch his face when he sees them landing and investigating his new site!
Bob and I laugh about it often when I'm making a dish and he'll quip, "you don't need no milk in that...you probably don't even need cornmeal....!"...and we'll laugh at the fond memories of the funny things his Dad did...and I realize how much I miss him.
Over the last 2 weeks, we've mounted 4 new bluebird/ tree swallow nest boxes and I now have 20 total! Thanks to all my friends for sharing their ideas and pictures of how they have mounted new nest boxes (special Thanks to Tammy Seaman for sharing her detailed plans!). I gleaned many ideas from their experiences!
With nesting season in full swing, I now have 5 bluebird pairs nesting with 20 eggs (at last check), 1 pair of chickadees with 8 eggs, and 14 tree swallow nests with no eggs yet. It did NOT take the birds very long to find the new nest boxes!
A Black capped chickadee nest can be identified by all the moss and fine hair materials they use.
Black capped chickadee nest - photo credit - Molly Plank. Where DO they find all that moss?
*Note: This fantastic photo of a chickadee nest with an egg and nestlings was provided by my friend, Molly Plank - my chickadee eggs have not hatched yet!
We were originally going to build another 10 - 15 nest boxes this past winter, but many things got in the way, including the fact that we couldn't find a good (and reasonably priced) supply of wood.
So, I gathered a bunch of my old nest boxes and used the still-good parts to construct 4 'new' houses that didn't leak. They'll still be replaced next year, but, for this year, they'll suffice. Then the challenges of how to mount them arose. Mr. Freeze hates the 4x4" posts. It is very hard to dig a hole for them AND, very hard to protect them properly. Besides, we have a bundle of unused t-posts, so we wanted to find a suitable method for using those. They are easy to get in & out of the ground here and they're easier to mount a wobbly predator guard on.
My requirements for setting up a nest box were:
- reasonably priced mounting supplies (in "kathy-speak" - that means, "cheap"!)
- easy! AND fast!
- easy-to-remember repeatable steps (because getting old sucks!)
- final plans approved by Mr. Freeze 😆
After reviewing everyone's ideas - and sharing them with Mr. Freeze, he came up with the optimal plan. Here's the list of supplies, tools and a description of how we did it. Now, next year we only need to build new nest boxes ...and maybe refer back to this post, so we'll remember the supplies and how we mounted them this year😁!
Supplies (per nest box):
Quantity
Supply
2
1" pipe wall brackets
2
1.5" - 2.5" (38/63 mm) hose clamps
1
1" x 18" schedule-40 pvc pipe (can buy in 6’ or longer lengths and cut-to-length)
1
T-post
1
6" wide x 5' length of galvanized stove pipe (I already had several of these, so we cut them in half with a cutter wheel on an angle grinder to make 2 - 30" long pipes)
5
8" zip ties
2
8" lengths of heavy duty wire (for mounting guard)
-
1/4" hardware cloth (cut to fit snugly inside the 6" galvanized stove pipe)
Tools:
Nut driver (to tighten hose clamps)Wire cutters
Portable Drill
1 bluebird house (add 'bird spikes' on top if you have owl issues)
T-post driver / sledge hammer
Wire cutters
With 4 newly-modified nest boxes, we found some nice spots on the trails to set them up.
The hose clamps are used to hold the 1" pvc pipe securely to the T-post.
You can use a nut driver to close the hose clamp, or a flat-head screwdriver.
Place the pvc against the T-post, slide the hose clamps over it, space them out and tighten them down.
Place the pipe so that it overlaps the t-post by ~5". Tighten the hose clamps to hold it in place.
Drill a hole all the way through the pvc pipe for the 8" heavy duty wire. Drill another hole all the way through perpendicular to the first.
Drill a hole for the support wire through opposite sides of the pvc pipe.
While holding your galvanized stove pipe in place, run a support wire through one side of the stove pipe, then through the pvc pipe out the opposite edge of the stove pipe. Run the second wire through the opposite set of holes in the same manner. The 2 wires should rest on top of the t-post where they cross each other as in the picture below.
It's a lot easier to look at the picture below, than it is to describe this process in words.😅
Run the wires perpendicular to each other through your pre-drilled holes in the galvanized stove pipe.
Wrap a zip tie around the wires and the pvc pipe to keep the guard from sliding back & forth.
Bend the ends of your support wires over so they cannot slide out of the stove pipe.
Your 1/4" hardware cloth should be cut to fit snugly inside the galvanized stove pipe. You can get a very close size approximation by placing the stove pipe on top of the hardware cloth and tracing the circle with a black Sharpie. Use your wire cutters to cut the hardware cloth. Cut a small hole in the appropriate place for the pvc pipe then slide the hardware cloth over the pipe and into the top of the guard. Use zip ties to secure the hardware cloth to the support wires. This will prevent any snakes from climbing up the t-post and killing your nesting birds.
It's important to make sure your hardware cloth completely fills up the inside of the predator guard, so a snake cannot get past it.
Now mount your house to the pvc pipe using the pipe wall brackets. We also added a short center screw in the middle of the bracket to ensure the house would not rotate on the pipe. Make sure the house does not sit on top of the predator guard, or the guard will not 'rock' and will allow raccoons to climb it.
A very small, short screw can be screwed into the middle of the bracket and into the pvc to keep the house from rotating.
I use these bird spikes on top of all my bluebird and tree swallow housing to prevent any owls from landing on top and spooking out the nesting birds. Before using these spikes, I had found many of my nesting birds had been killed by our resident Barred and Great Horned owls. Since adding the spikes they have not been able to get to them.
By cutting a large hole in the door (approx. 3" wide x 2" tall), I can use this vinyl (siding from leftover building materials) and cut out different entrances used by various birds. In this case, Bob drilled out a 1.5" hole with a Forstner bit. But, if a tree swallow decides to move in, I can remove this plate and put a TRES slot entrance on this hole.
The doors on each nest box also have the set screws already installed for the Van Ert trap...just in case it's needed. It's old, but this nest box will suffice for this year.
These 'plates' can be easily changed out, based on which bird species is trying to claim the nest box.
TRES slot entrance - 7/8" tall x 2.25" wide. Exact height is critical to exclude English House Sparrows. Use digital calipers to get correct size.


